5 Tips to Nail the Best German Chocolate Cake
The Best German Chocolate Cake
Have you ever wondered why some cakes become legends while others fade into obscurity? Could it be that one of the secrets to baking success lies in mastering just a few key techniques? Today, we’re diving deep into the world of German chocolate cake, exploring how to make your next dessert not just good but unforgettable. So, are you ready to discover what makes this classic treat so special and learn how to perfect it yourself? Let’s get started!

Table of Contents
Overview
German chocolate cake is more than just a dessert; it’s an experience. This rich, decadent cake has been delighting taste buds for generations with its unique combination of flavors and textures. Making this cake requires about 2-3 hours from start to finish, including preparation and cooling time. Don’t let the time commitment scare you off—it’s rated as intermediate difficulty, meaning anyone with basic baking skills can achieve greatness with a little practice.
Essential Ingredients
To create the ultimate German chocolate cake, you need quality ingredients. Here’s a list of must-haves along with their importance:
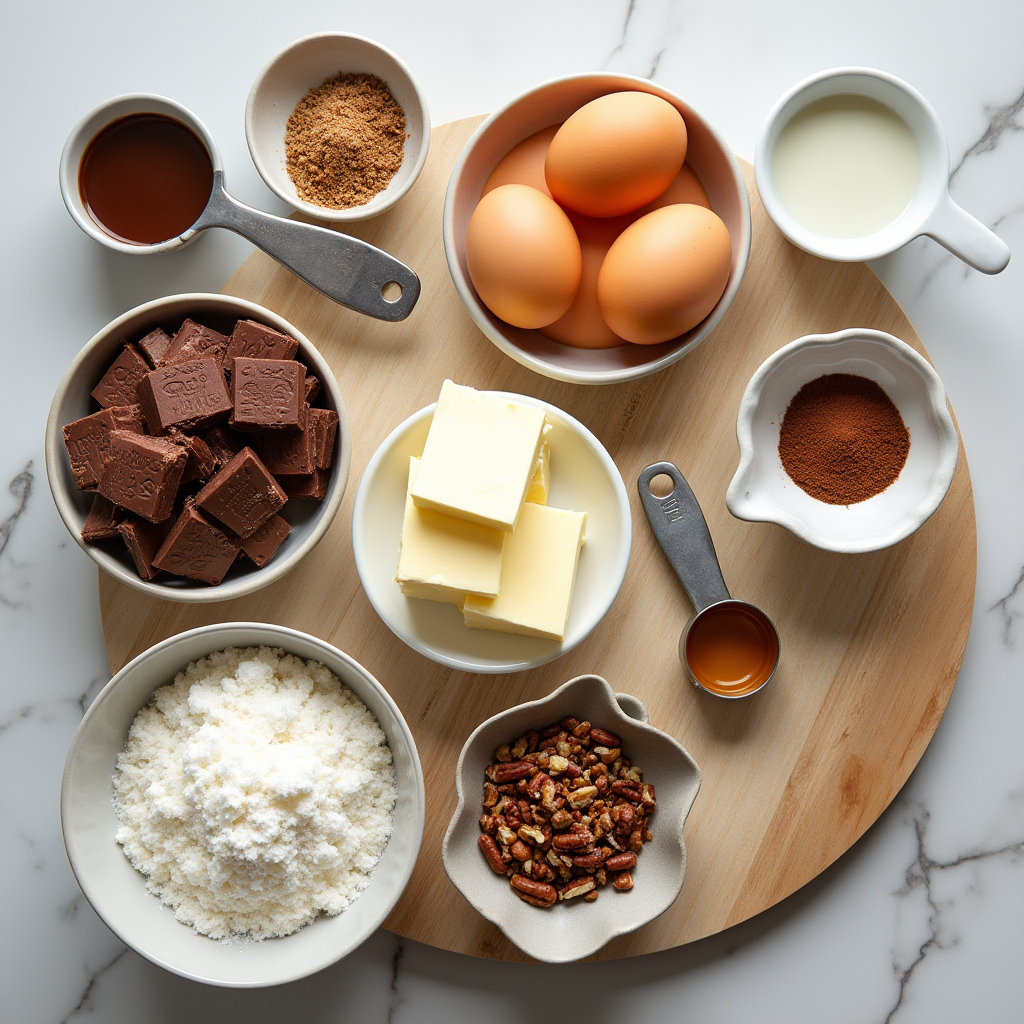
- Chocolate : Semi-sweet or German sweet chocolate forms the backbone of this cake’s flavor profile. It provides depth and richness without being overly bitter 8.
- Buttermilk : Adds moisture and tenderness to the crumb. If you don’t have buttermilk, you can substitute by mixing milk with vinegar or lemon juice 7.
- Eggs : Act as binders and contribute to structure and leavening. Separate egg whites can be beaten until stiff peaks form for added lightness if desired.
- Flour : All-purpose flour works best here, providing structure without overpowering other flavors.
- Cocoa Powder : Enhances the chocolate notes. Dutch-process cocoa is preferred because it gives a darker color and smoother taste compared to natural cocoa 8.
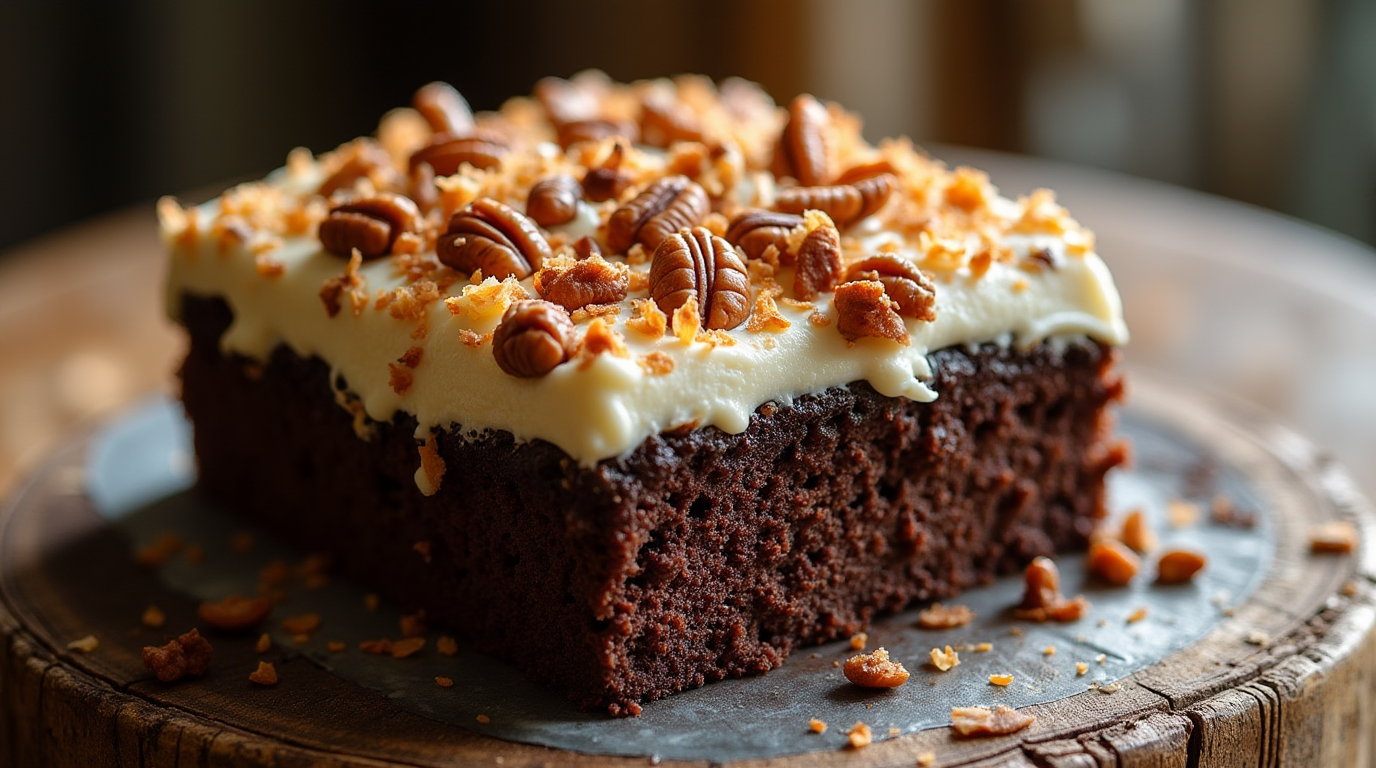
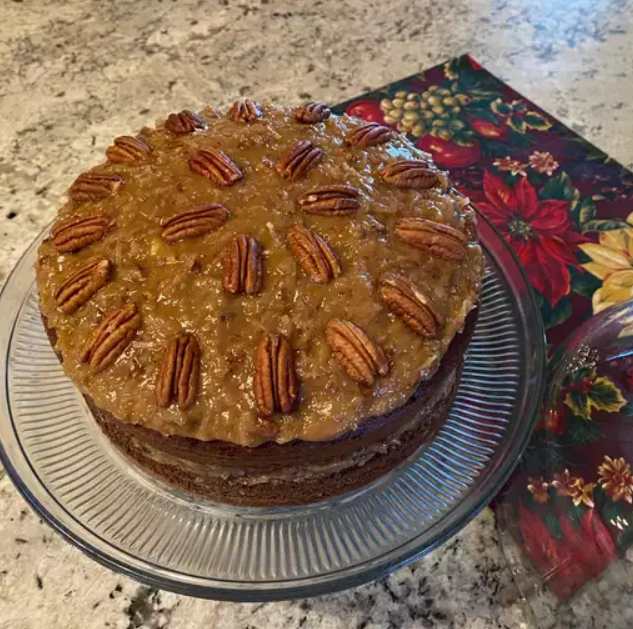
- Coconut-Pecan Filling : A defining feature of German chocolate cake, made using evaporated milk, sugar, eggs, butter, shredded coconut, and chopped pecans. Be careful not to overcook this mixture, as doing so can cause it to become grainy.
Substitutions & Variations
If you’re looking to tweak the recipe slightly, consider these options:
- Replace part of the all-purpose flour with whole wheat pastry flour for added fiber.
- Swap out pecans for walnuts or macadamia nuts based on preference or dietary restrictions.
- For those avoiding dairy, try almond milk instead of buttermilk after acidifying it similarly.
Step-by-Step Instructions
- Preheat Oven & Prepare Pans : Preheat your oven to 350°F (175°C). Grease three 8-inch round pans and line bottoms with parchment paper.
- Mix Dry Ingredients : In a large bowl, whisk together sugar, flour, cocoa powder, baking powder, baking soda, and salt. These dry ingredients will provide the foundation for your cake layers 1.
- Combine Wet Ingredients : In another bowl, beat eggs lightly before adding buttermilk, oil, and vanilla extract. Mix well until combined smoothly 3.
- Blend Wet Into Dry : Gradually incorporate wet ingredients into the dry ones, stirring gently until everything is fully incorporated. Avoid overmixing which can lead to dense cakes.
- Pour Batter Evenly : Divide batter evenly among prepared pans ensuring each layer receives equal distribution.
- Bake Until Done : Place pans in preheated oven and bake approximately 30 minutes or until toothpick inserted comes out clean. Cool completely before frosting.
Assembly
Once your cake layers have cooled thoroughly, it’s time to assemble them. Begin by spreading a generous layer of coconut-pecan filling between two layers, pressing gently to adhere. Frost exterior with homemade chocolate ganache or store-bought frosting depending upon convenience level desired. To present beautifully, garnish top edge with extra toasted coconut flakes and additional nut pieces.
Storage and Make-Ahead Tips
Store leftover slices tightly wrapped at room temperature up to three days or refrigerate extending shelf life further though texture may change slightly becoming firmer when chilled. Reheat individual servings briefly in microwave restoring softness quickly.
For planning ahead, both unfrosted cakes and prepared fillings freeze exceptionally well separately wrapped securely preventing freezer burn occurring during storage period lasting several months prior defrosting naturally overnight refrigerator before proceeding assembly steps outlined earlier.
Recipe Variations
Feel free to experiment beyond traditional boundaries such as incorporating caramel swirls within layers enhancing sweetness factor significantly; alternatively opt fruit compotes like raspberry coulis drizzled decoratively atop finished product adding vibrant pop contrasting against dark hues present throughout remainder composition altogether creating visually stunning presentation piece worthy celebration anytime year round!
Conclusion
Creating the best German chocolate cake doesn’t have to feel intimidating once armed knowledge shared today regarding ingredient selection through final decoration stages discussed thoroughly hereinabove. Encourage experimentation finding personal touches making every batch uniquely yours enjoy sharing results loved ones alike knowing satisfaction brought crafting something truly special everyone appreciate equally much alike.
FAQs
Q: Can I use regular chocolate instead of German sweet chocolate?
A: While possible, results won’t mirror authentic version exactly since German sweet chocolate contains higher sugar content producing sweeter end product overall.
Q: What health benefits does German chocolate cake offer?
A: Though primarily indulgent dessert option containing fats sugars associated typical baked goods, inclusion nuts offers beneficial fats alongside minerals such magnesium zinc found coconuts contributing positive nutritional profile small portions consumed occasionally fit balanced diet context.
Q: How long should I cool the cake before frosting?
A: Allow cakes cool completely minimum hour room temperature avoid melting frostings applied warm surfaces potentially ruining appearance texture final creation